In the last post of the series, I explained how I designed the factions, puzzles, and the story for the pirate role-playing game I organized in December.
In this post, I’ll detail how I made every prop that was used during the game. From the map, notes, and clues for the puzzles to the coins for the in-game currency and the treasure, and without forgetting the keys, daggers, and crooked dice used during side quests or mini-games.
Making all written content for the puzzles
All written props were made using a dip pen, which made the process a bit harder, but allowed me to give an old-school look by making ink blots and letting the ink drip on the paper at certain spots. I’m not very used to writing using this tool, and I don’t write by hand a lot anyway, so I’m sure the effects could be vastly improved, but it was very fun!
However, if you don’t have any on hand, you can have a very good result with a pencil.
Preparing some papers
The first step is to get some paper and give it a weathered/aged look. Put your paper in a baking sheet, make some coffee or some tea, and pour it all over the paper. Let the paper soak completely, and leave it there for a few minutes so that it can take some color from the liquid, then you can put it in another dry baking sheet, and bake it for a few minutes.
You can also crumple the paper quite a bit before putting it in the liquid to give it a weathered look on top of aging it (very useful if you want to simulate paper that got wet, folded, maybe a few tears here and there…).
I had a few sheets already weathered from the last time I needed some, and while I started writing, Kaonashi made me a few more.
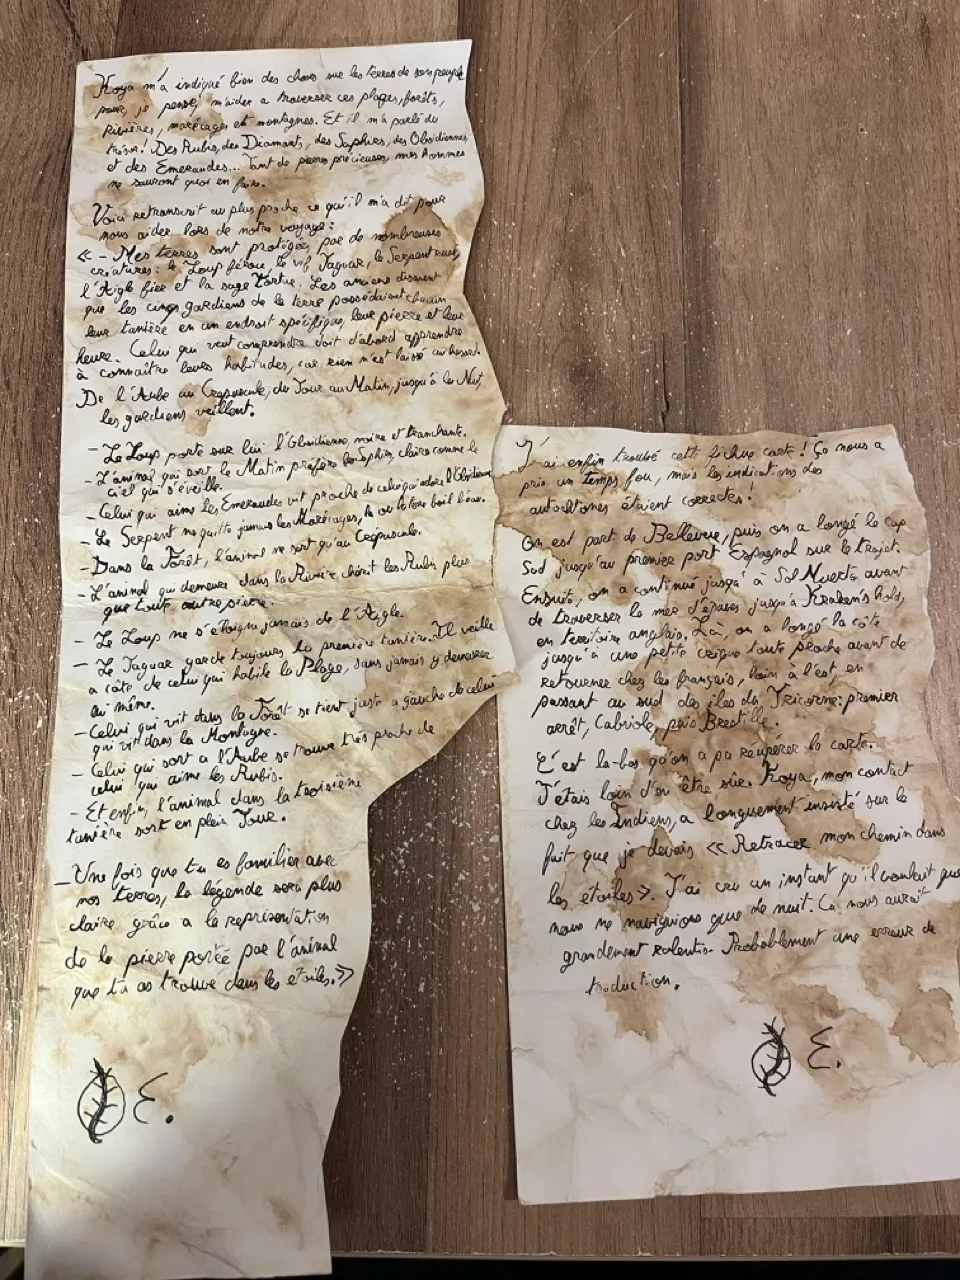
Simple notes and clues
I started by writing a first draft on my computer with all the information I needed
For the simple notes, I started by writing a first draft of the document on my computer with all the information I needed and trying to match the style of the 18th century pirate who would have written them (adapting accordingly to the author, so I wrote some from the Captain looking the treasure, using a tone of a man seeking something from all his heart, while the notes from the logbook of the Black Thorn were more factual, cautions and sometimes even containing some warning). Then I used an AI to help me refine the sentences by adapting the vocabulary and updating a few metaphors. Finally, I made a third pass on the text, proofreading everything and making sure everything is clear, still easily understandable (when it needs to…), and that it made complete sense in the overall story.
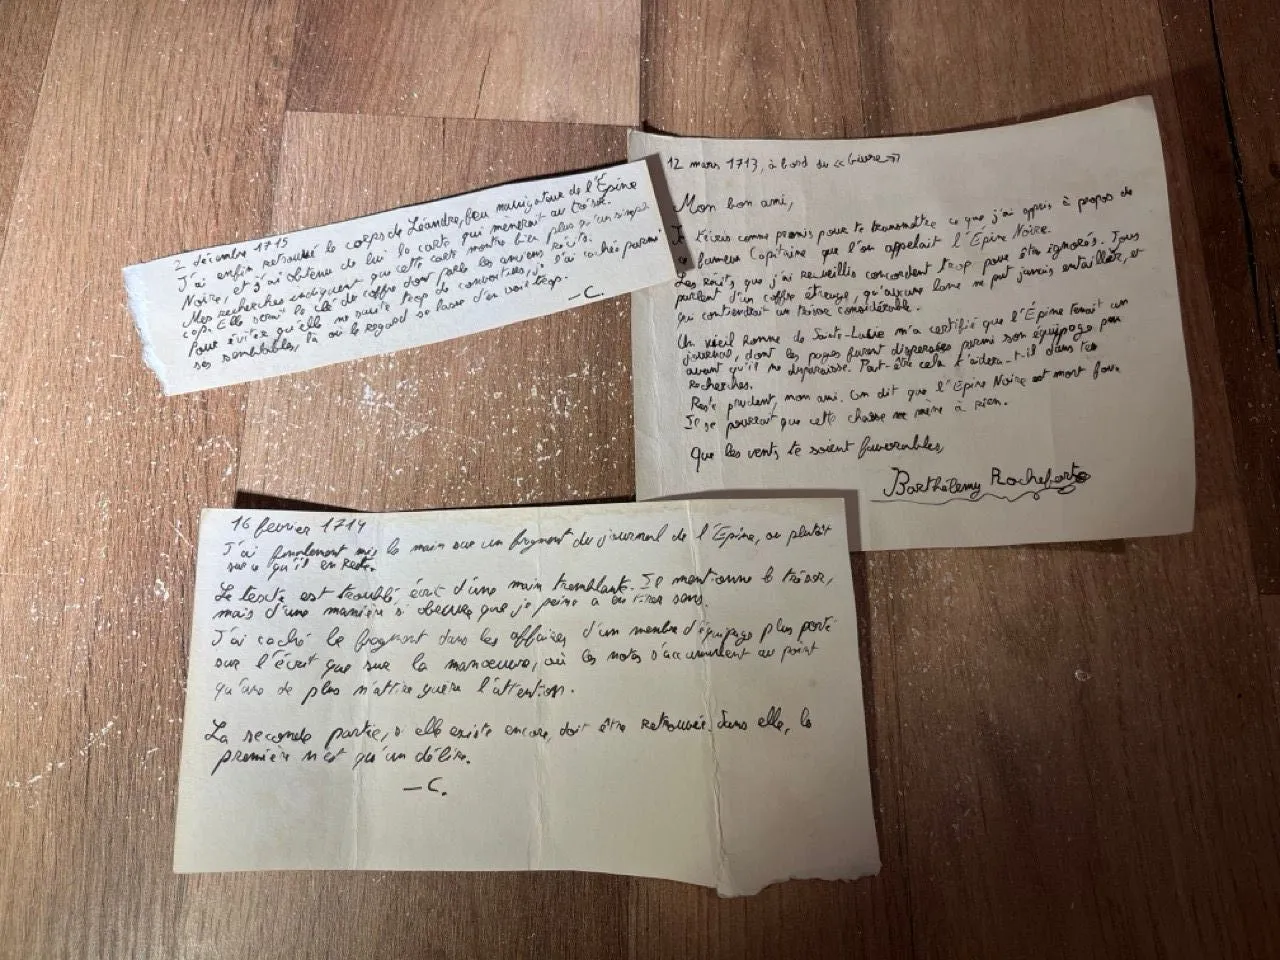
Some of the random notes created for the game.
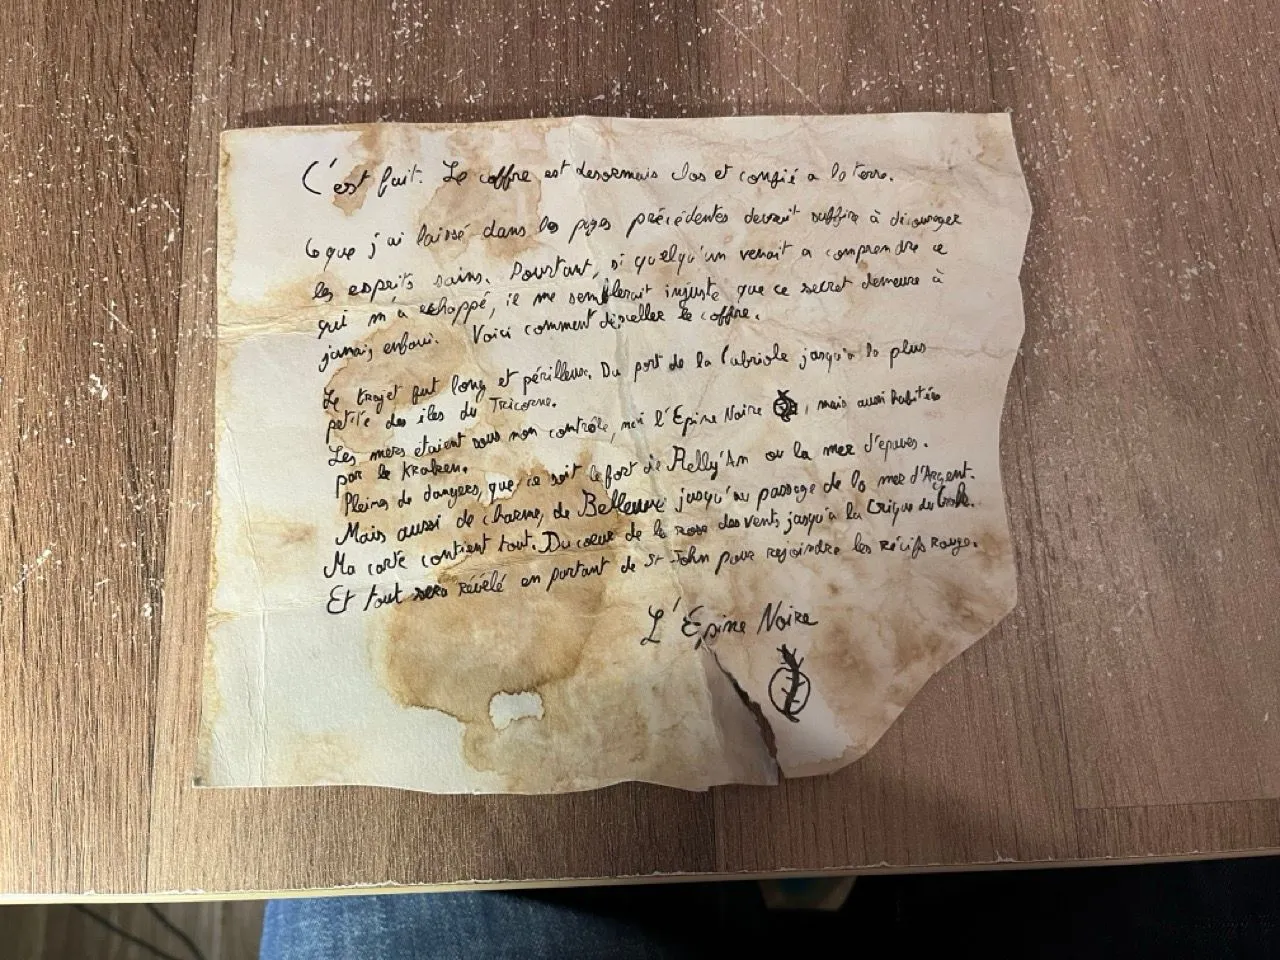
The map
Since I had decided that the map would contain a folding puzzle, I thought I couldn’t just draw things and started by inserting the puzzle elements first and then drew everything around it.
I started by folding the paper multiple times, putting two marks on each fold so that I knew what the instructions should say (“from X to Y”) to have the players recreate the fold. Then I wrote the code on the back of the map, making sure that each number was spanning multiple layers of paper, and trying to get a few lines on the initial layer because I thought this would be a great effect to see that part of the solution was in front of your eyes at all times.
Then I started drawing some geographical locations around the marks, a coastline, and a few islands. Once I had everything in place, I named every spot used for the puzzle, a few ports, one sea, some creeks, a monster, left a place for a wind rose, and made a signature on a corner. I then switched back to the dip pen and drew everything. I added a few elements to add personality to the map, including a sunken ship and a fun kraken.
At this step, I redid the folding to make sure everything was looking good, and once I had checked that it was, I started adding tons of other locations to the map. I used a location name generator in Spanish, French, and English, and filled each big island with items from one language.
I then titled the map, drew a more detailed wind rose at the bottom, and moved on to the final touches. I added a few lines and scratches everywhere on the map, so that it wouldn’t be obvious that the lines on the back and front would form some characters. I then folded the map on different spots as well, just to give it an older look and to make sure that the puzzle wouldn’t be solved through a lucky brute force.
After that, I called it good.


The map front, back, and folded to reveal the code.
The instructions to fold the map for the Loyalist faction puzzle.
The constellations and stones drawing
I needed to draw a constellation from which the shape could be traced on the map. I thought the Eagle, with its wings, would be somewhat easy to put on the map. I started tracing it on a big piece of tracing paper over the map, noting the cities, forts, or villages I was passing through. I then prepared another piece of tracing paper on which I drew 5 boxes to receive the 5 animals. I replicated the shape of the Eagle I had just drawn, and added the four other animals using a similar number of points (so that the length of the instructions would not indicate an obvious solution).
As for the precious stones, I directly drew the five stones on a piece of tracing paper, as the correct one would just be the solution to the zebra puzzle I hadn’t written yet.
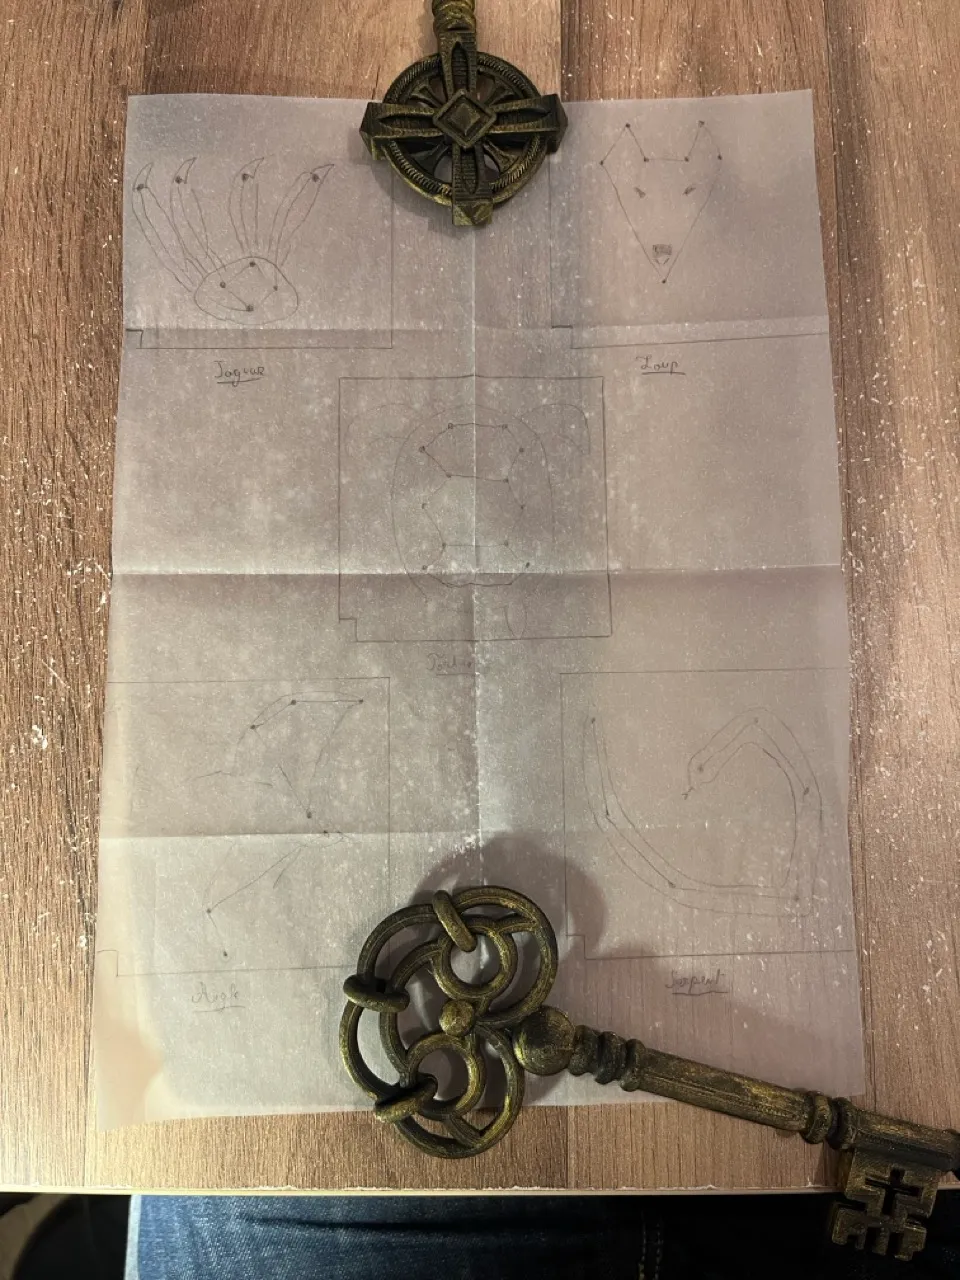
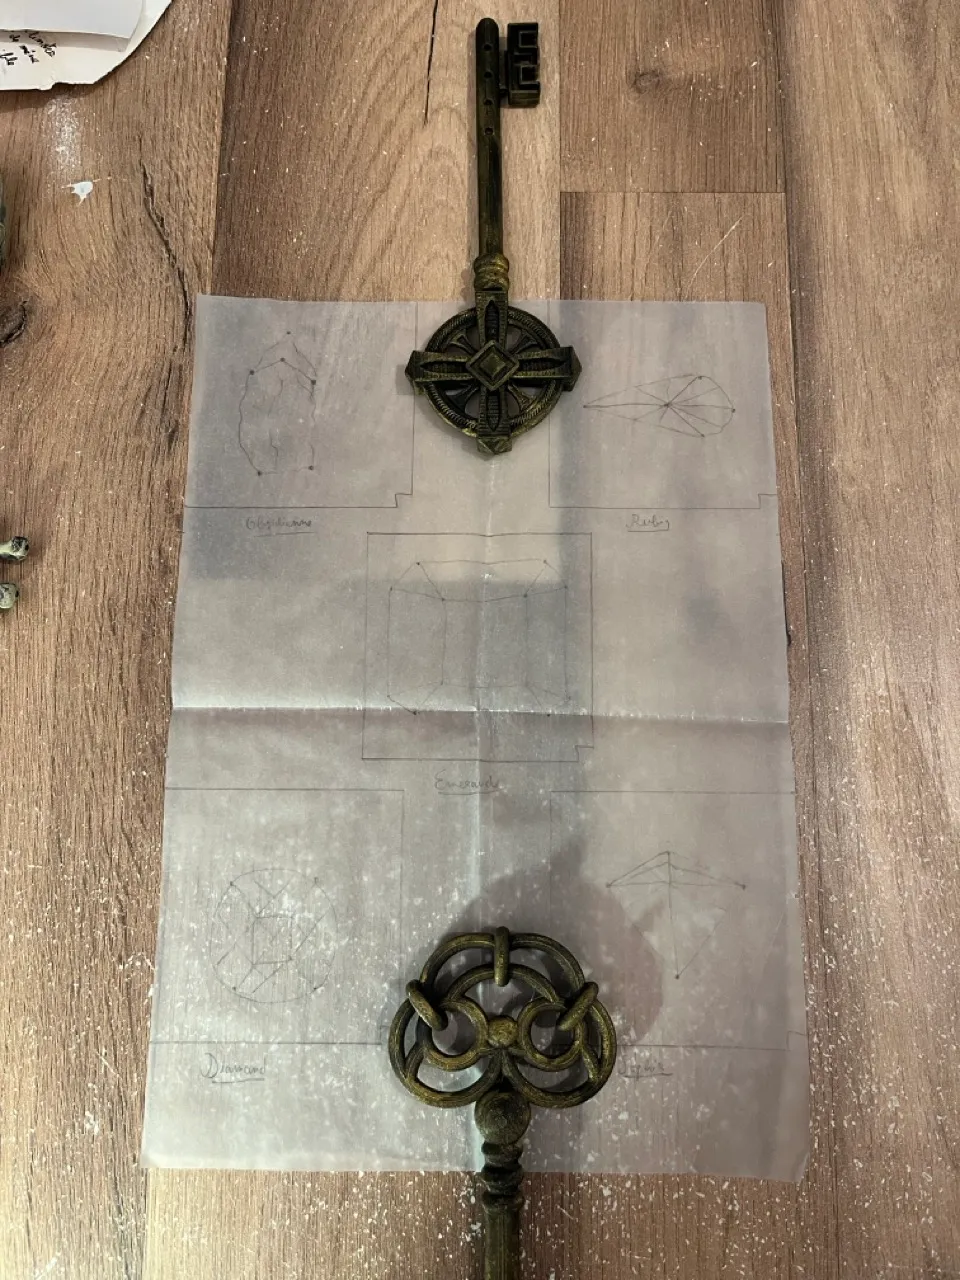
The constellations and stones drawings.
The zebra puzzle
To prepare myself to make this puzzle, I went to https://www.puzzleship.com/logic/zebra-puzzles and went through a few existing puzzles to get a feel for the kind of clues that felt satisfying to solve, and I noted a few tricks I wanted to use on my own puzzle.
Then I had to pick the number of elements of the puzzle. I knew I needed 5 different groups to match the number of animals and stones I had drawn, and from the examples I practiced, I figured four elements per group would provide a good challenge without being impossible. So I added the animal location and the time of the day they would go out.
I drew a grid and filled it completely at random. Next, I drew a new empty grid and started writing down clues that helped me progress and fill the grid.
Taking inspiration from the examples, I started with three clues, giving each one an item on the grid, and then moved on to more complex clues using some of the tricks I had noted earlier (ie, two clues taken together allowing me to make some progress…). I made sure to give new information slowly, avoiding giving any hint on the stones until the end and building on new intel before making progress, making sure that the players would have to complete almost the entire grid before getting the solution to the puzzle.
I then randomized all the clues, rewrote them using a more ominous language (but still being very clear on the words), and wrote the puzzle prompt on a weathered piece of paper. When giving some lore around the puzzle, I was careful to write every item at least once so the players could deduce what they were looking for.
The zebra puzzle for the Curseseekers faction.
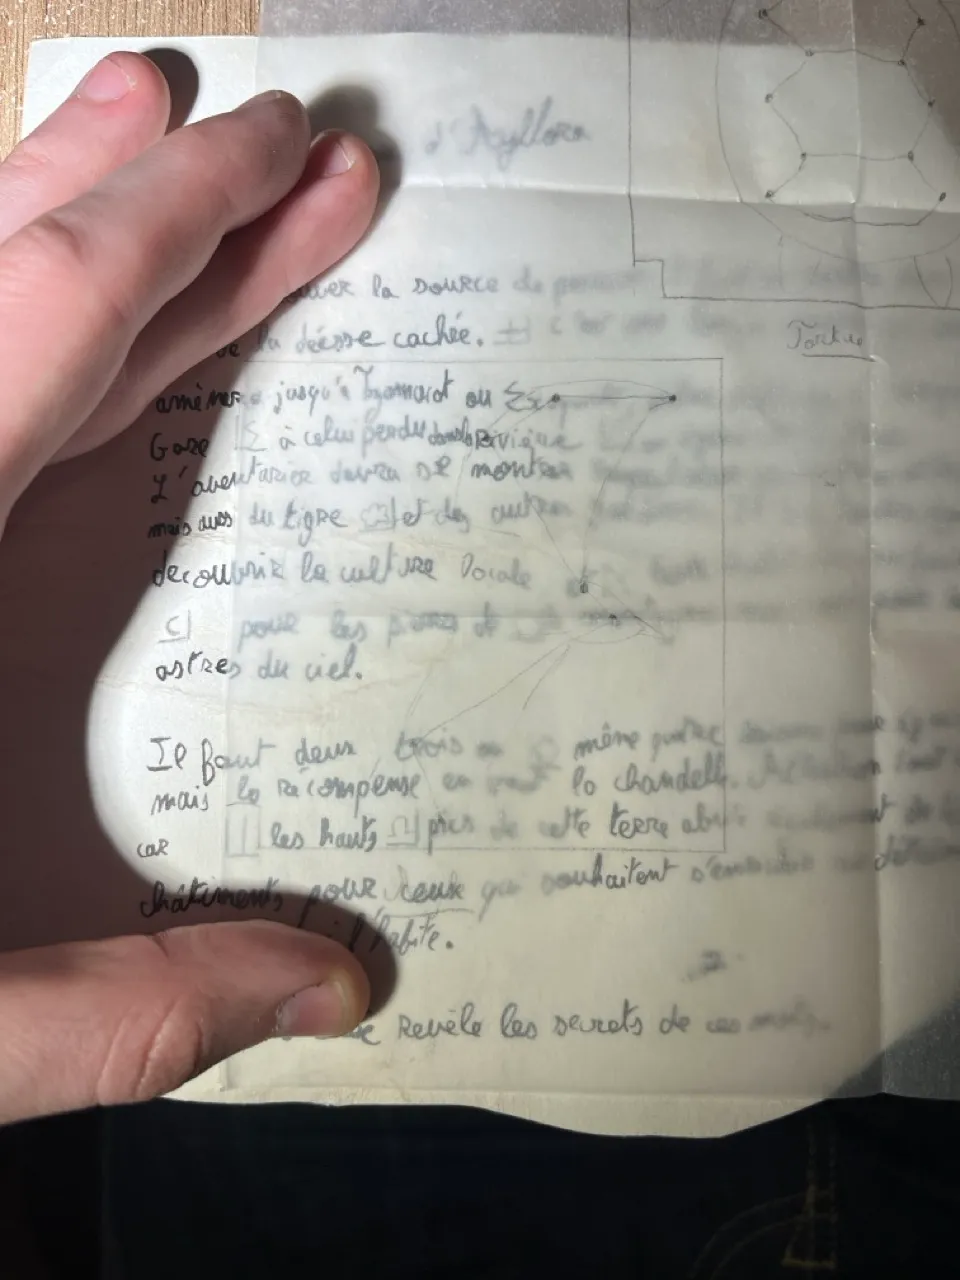
The Legend
At this point, I had the puzzles to deduce the animal and the stone, and their drawings ready, so I could work on the legend.
I came up with a sentence that would be the solution to the legend. I made sure it had the same number of words as there were points on the two drawings. Next, I drew two little symbols on some weathered paper where I’d write the legend to indicate where to place the drawings, and marked with a dot where the points on the tracing paper were landing.
I then wrote the sentence, one word per point, erasing the dot just before writing so that nothing would give the words away. I added other symbols at random on the page, so that the players could not guess at random where the tracing paper was supposed to go, and painted on the small ritual dagger the two correct symbols.
Finally, I just had to write the full legend around the words, making sure to form coherent sentences. This was not as simple as I thought! I had to be careful to write in a very predictable width so that I’d have the place to write my sentences without having to squish some words, which would look suspicious! And just forming coherent sentences wasn’t trivial either when the words popping at random didn’t always make sense with the last sentence. But I got it done, and it ended up looking quite good.
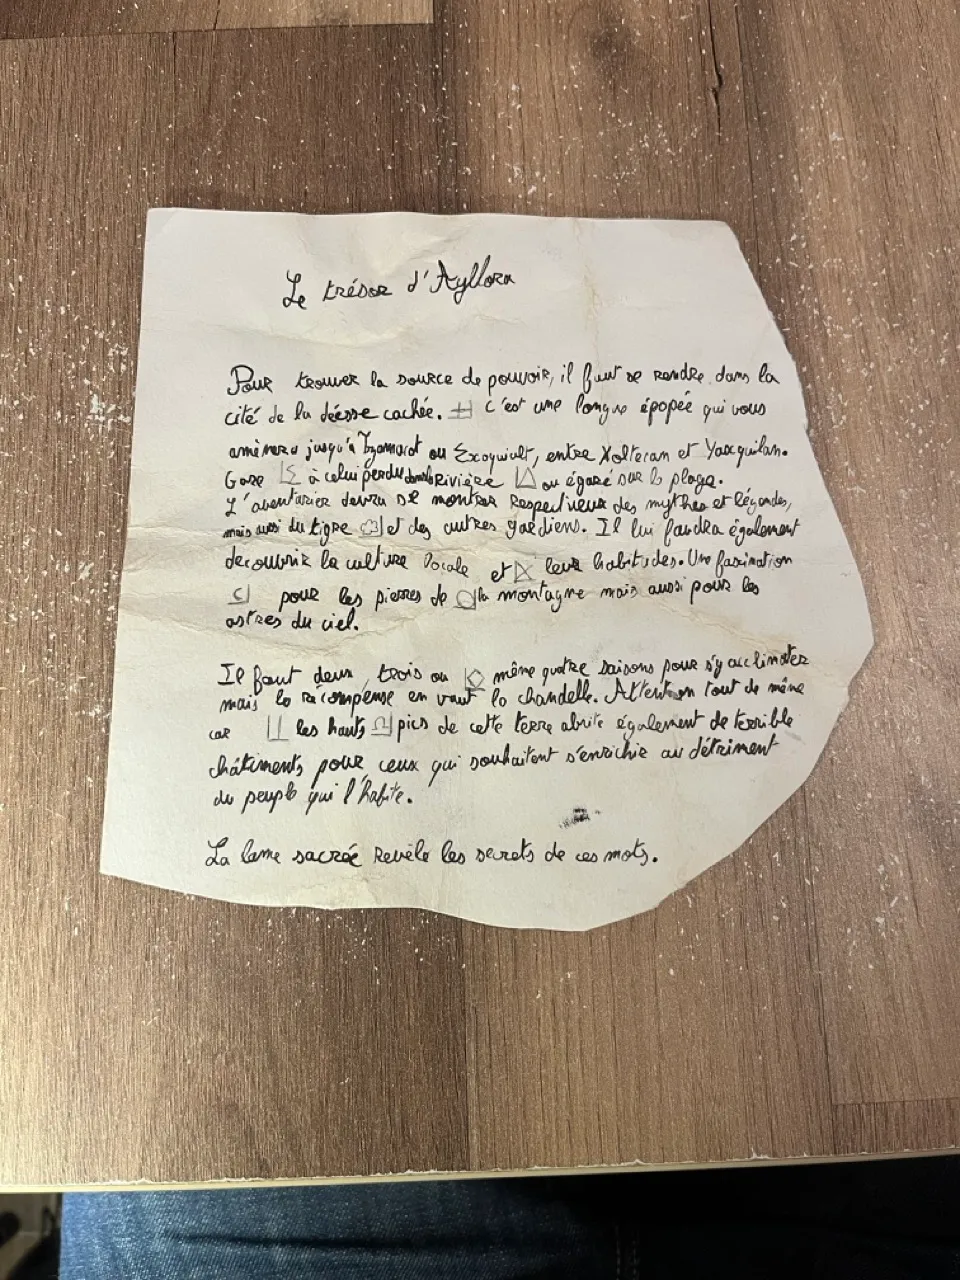
The legend showing the hidden phrase revealed. The little notch on the bottom left of the box helps positioning the paper.
Coins
That was it for the puzzles! Once this big part of the game was ready, I moved on to other kinds of props. I relied heavily on Kaonashi’s 3D printer to make them. First stop: Gold!
Players currency
For the coins used by the players to exchange information or buy drinks, I used a set of five coins so that I could have different types to create some variety. Kaonashi helped me a lot with those and painted them for me since I was in a time crunch, to avoid looking too new, those coins received a heavy dry brush of gold, so that the deeper recess would receive less paint and let the black of the filament give a more dirty and old look. The sides were also sanded a bit so the coins would be a bit uneven, adding to the look while masking some imperfections.
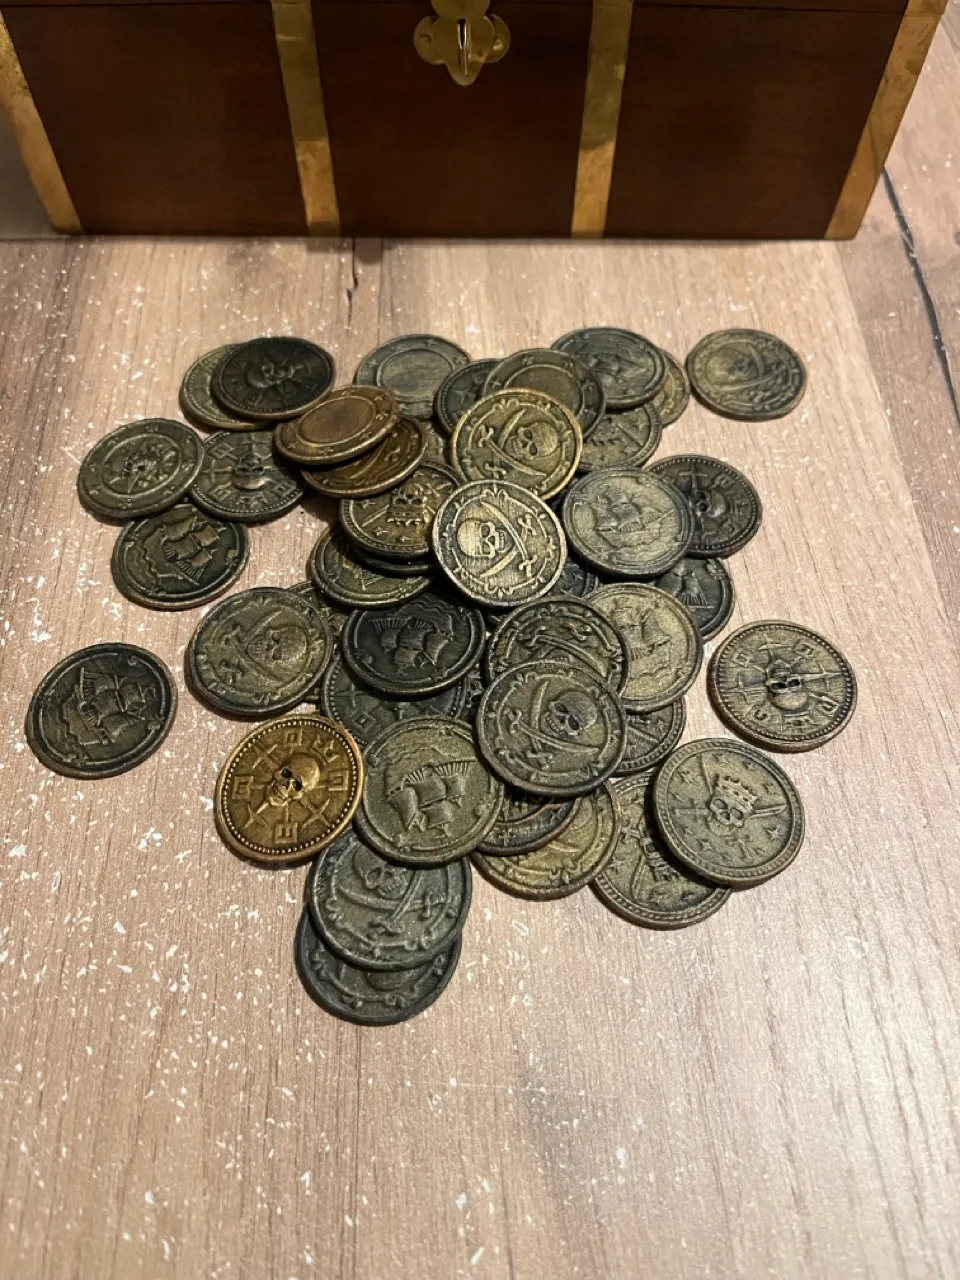
The coins used for exchanges and buying drinks.
For the treasure
For the treasure, I found those coins that reminded me of the jewelry from the movie El Dorado, so I thought they’d be perfect!
The model is super simple. I printed 2x25 of them in a few hours, then used a gold spray can, and they were done.
I also added this symbol from Pirates of the Caribbean as a fun easter egg in the chest. It went through the same treatment.
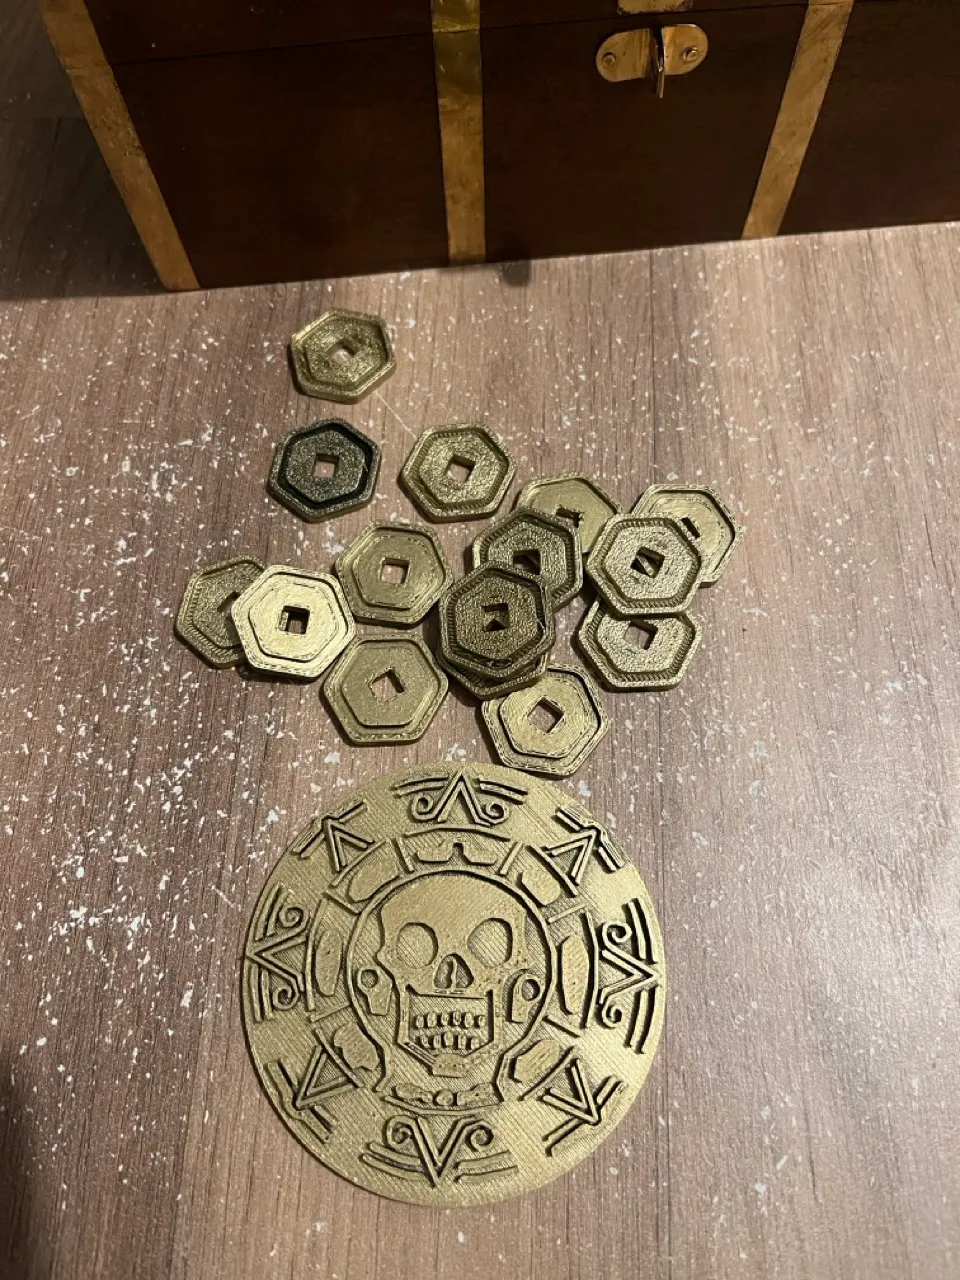
The treasure coins found in the chest
Keys
Skeleton key
This skeleton key was printed, glued together, then painted with a dry brush of Citadel wraithbone paint, couldn’t make it simpler if I wanted to!
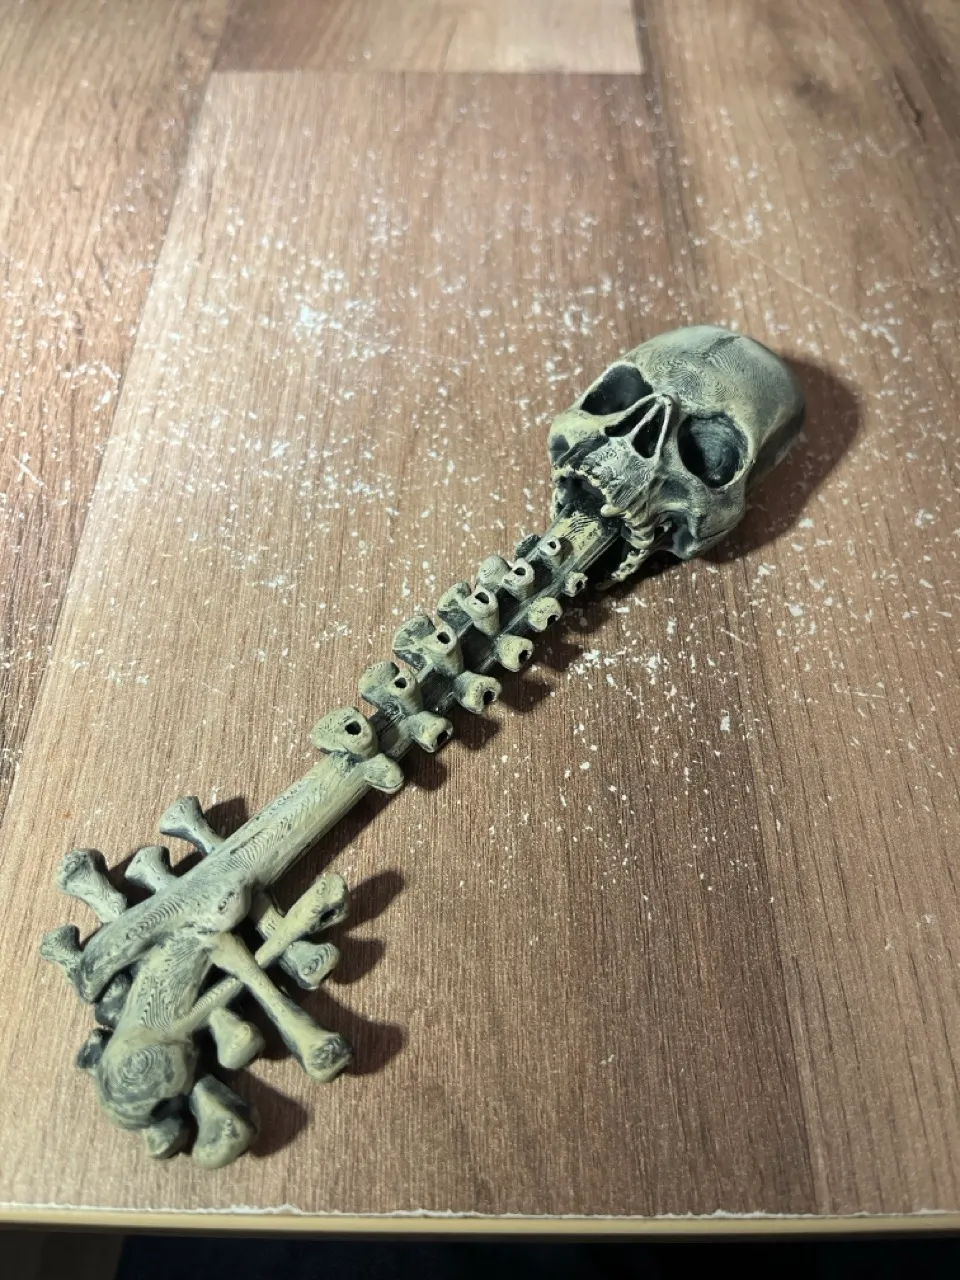
The skeleton key opening the armory.
Ancient keys
For the side quest needing keys, I printed two fantasy keys and did a simple dry brush of gold on them so they wouldn’t be too shiny. They might deserve another paint job if I need to use them again, but that was enough for the party!
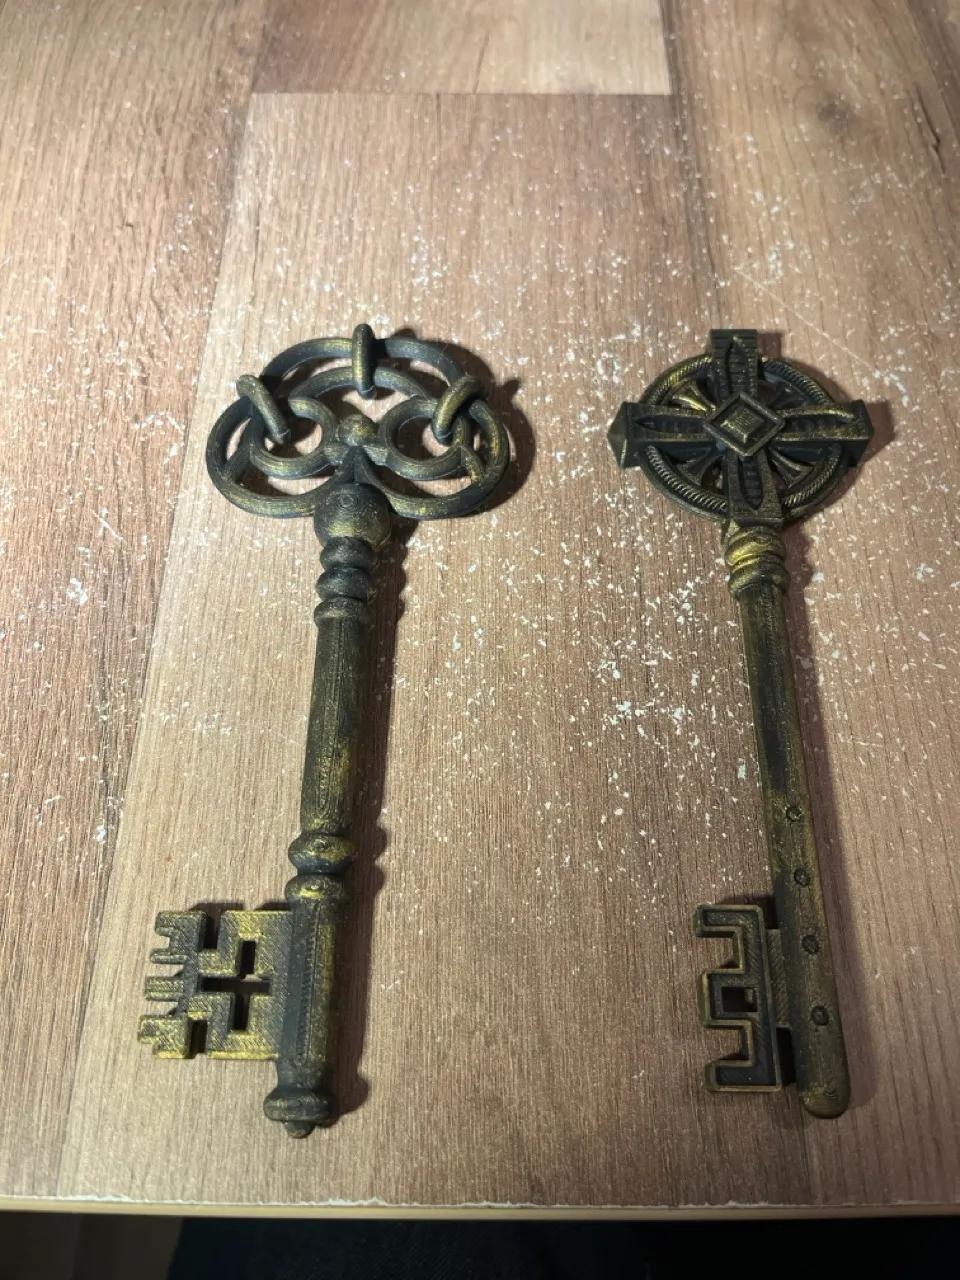
The ancient keys used for a side quest
Weapons
I made a few weapons for the game. One ritualistic dagger for the Curseseekers puzzle, a few daggers for the armory, and in case the Mutineers prepared a coup, one hammer for a friend, and one sword for me!
For the daggers, I printed multiple models:
This one for the Curseseekers puzzle, this one inspired by Sea of Thieves, this simple medieval dagger, and this last one twice.
To paint them, I kept it simple: a spray of black on the blades, followed by a spray of silver. A spray of gold on the handle for those that needed it (the sea of thieves one was printed using a wood-like filament, so the handle was brown and stayed that way).
Then I just had to glue the handles to the blades, and they were ready.
For the hammer, I painted the handle by hand since it was printed in one piece.
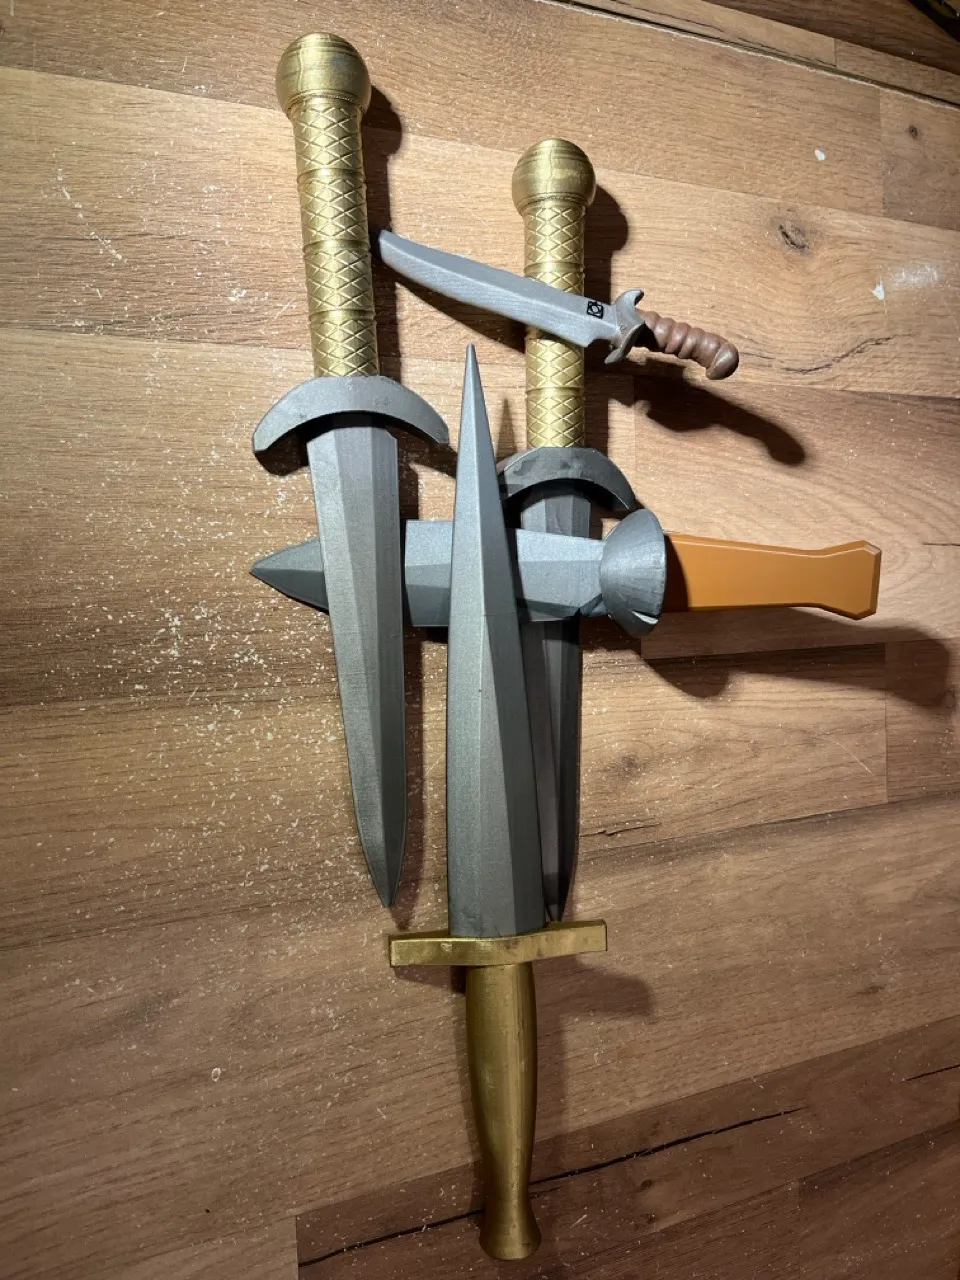
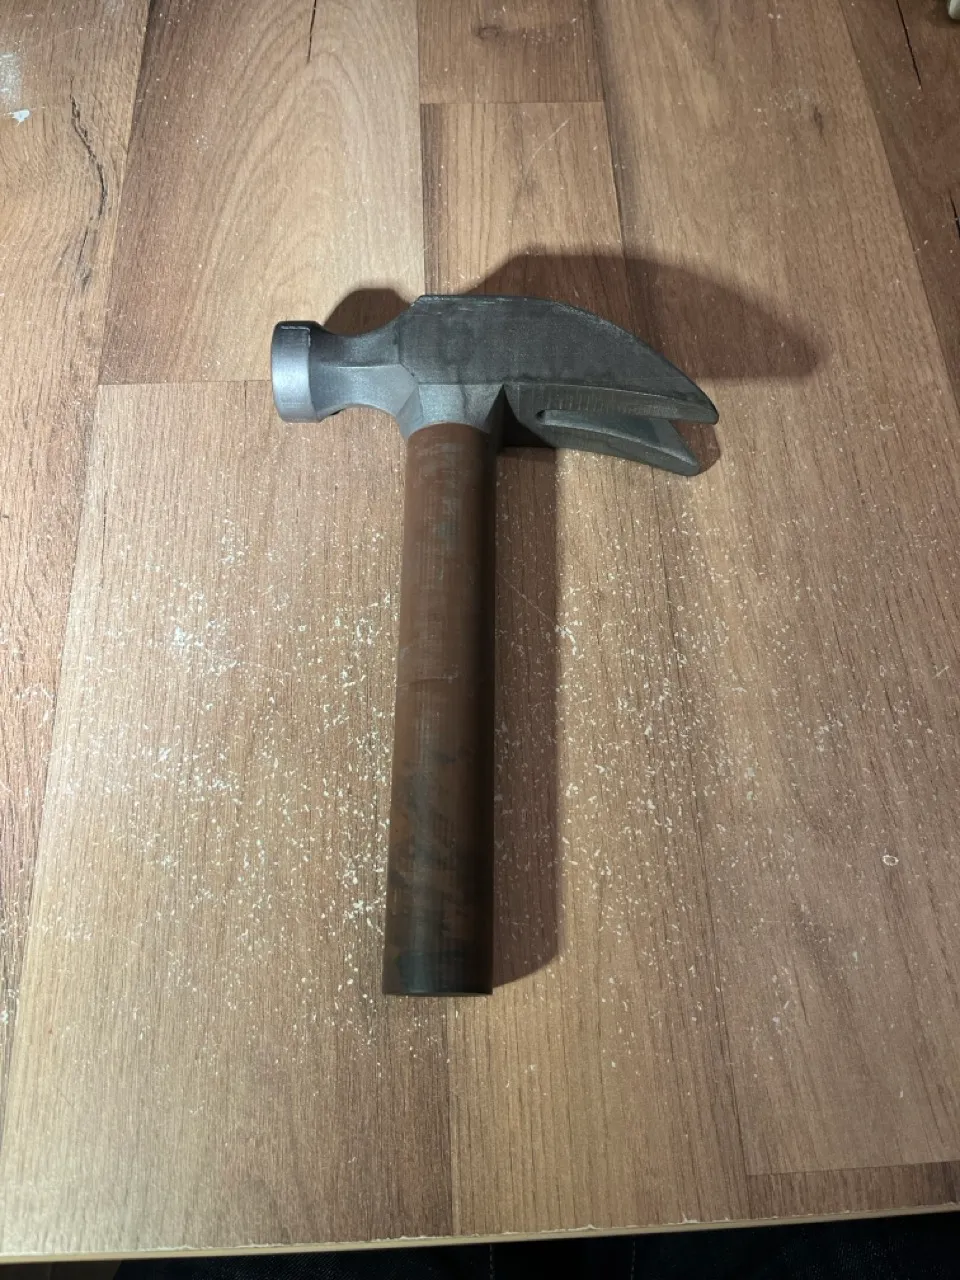
The daggers and the hammer.
I also painted this sword, but it was for my costume, not as a prop for the game!
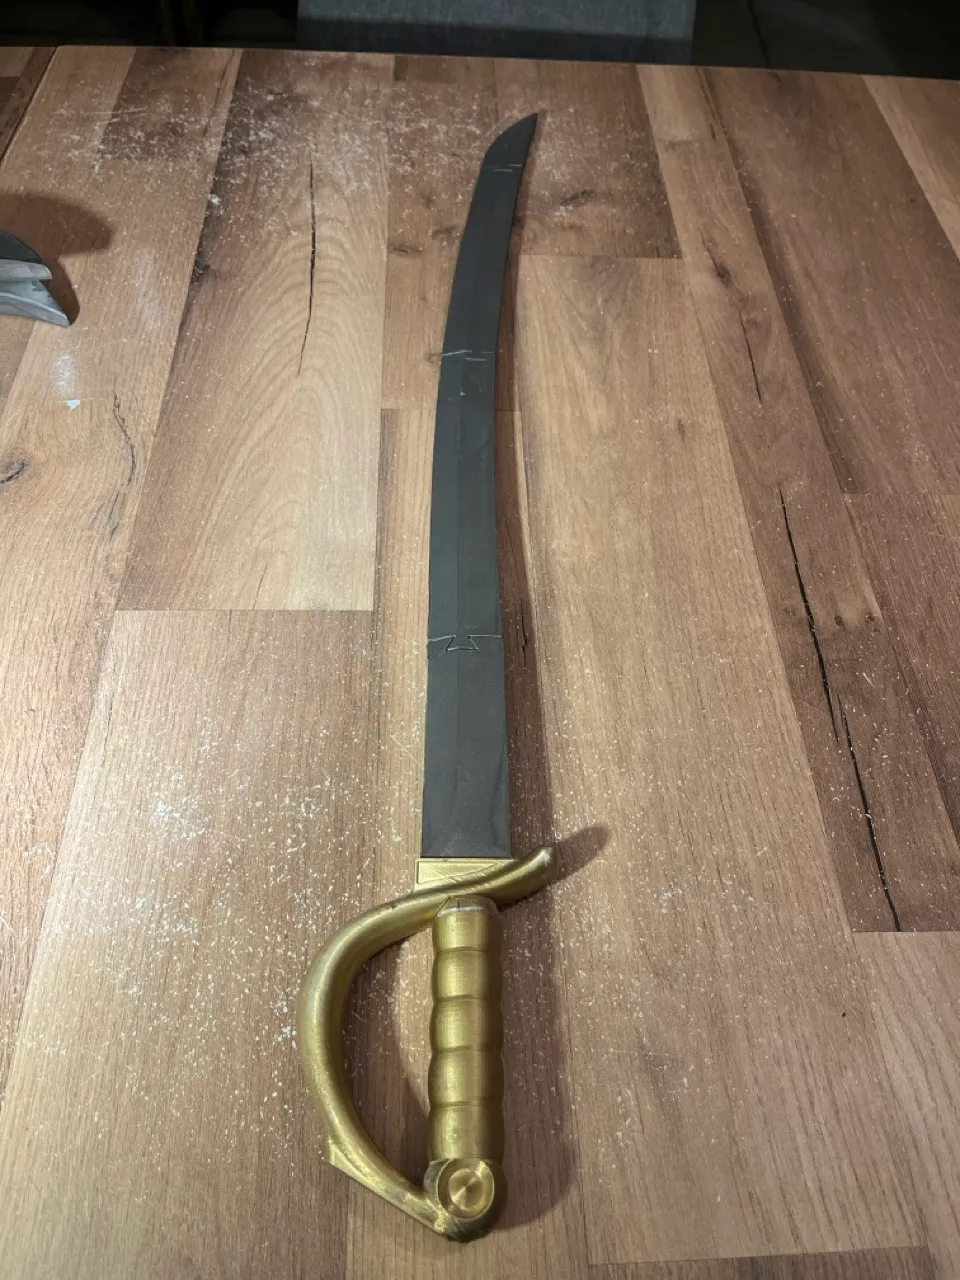
The sword used for my costume.
Dice
I also printed a pair of loaded dice, I painted them using a bone-like color, and used a black pen to mark the dots.
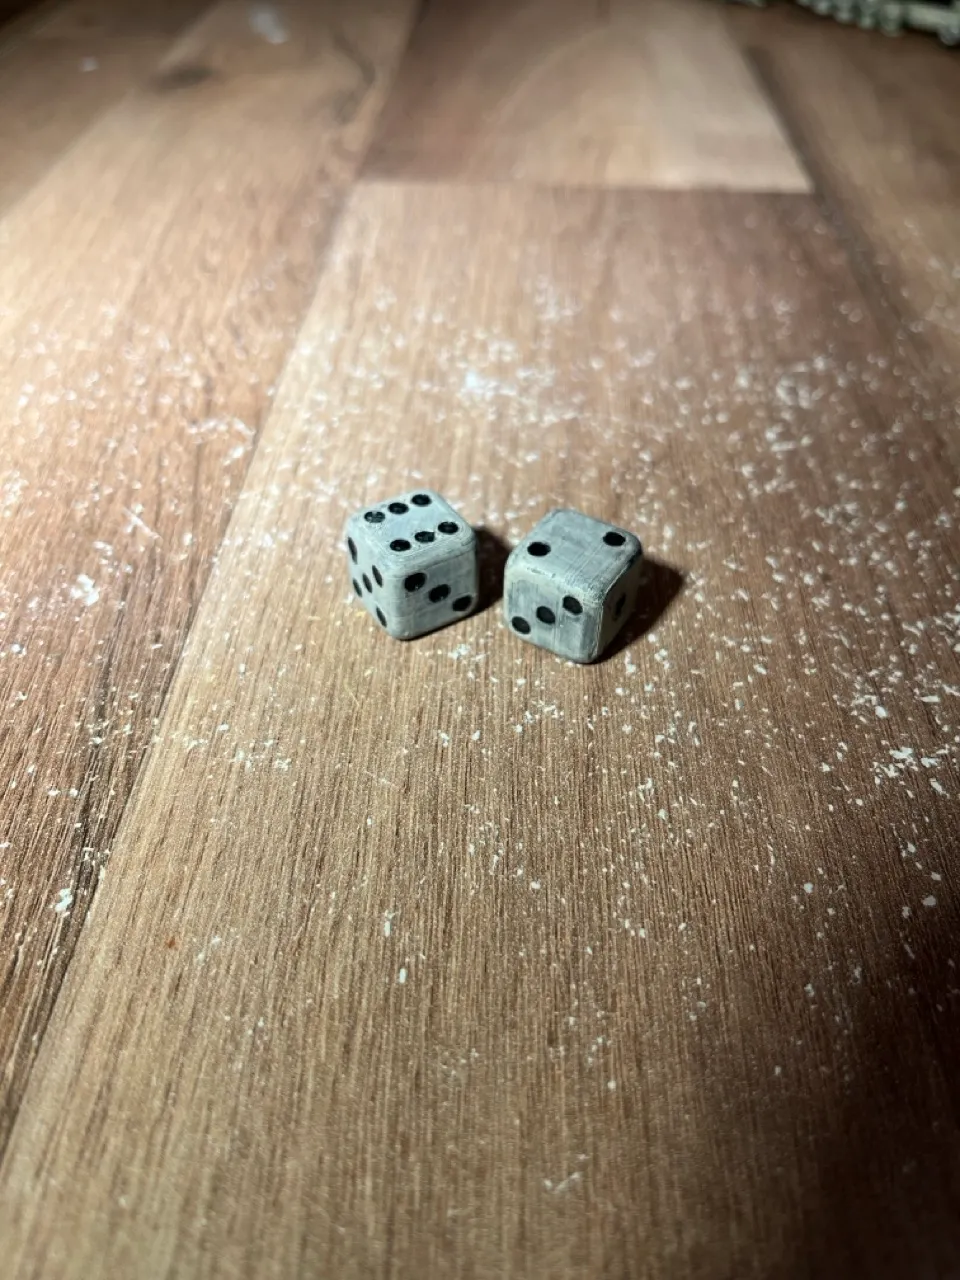
The loaded/crooked dice.